Welcome to Victorias Stop-Motion Puppet Building Part 1, where I will be talking through the process of making a puppet for my Stop-motion animation for my final college project.
Part 1
From concept to reality
I had done the concept art for my caterpillar character now it was time to make him,
I had chosen to make puppets over the wallace and gromit style clay figures as my experience of using clay models had not been a good one espeicially as I had to remake the models for my first stop motion animation because they had melted in my hands.
From my previous experience I had also found that making models that where lightweight helped when moving them around so i needed a base for my model that was light and also something that could be moulded into any shape I wanted, I chose styrofoam.
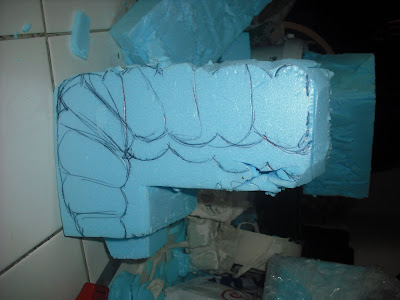
I drew the shape of the caterpillar on a block of styrofoam and proceeded to carve it out, a bread knife or saw works well for this.
This is my second go at the caterpillar, unfortunatley I lost the first lot of pictures. This failed attempt was a godsend because it helped me realise that i had to change the characters shape slightly in order for it to stand up. That is why the drawing on the styrofoam is slightly different to the concept.
After I had carved out the rough shape of my caterpillar I proceeded to carve more detail, a craft knife works best for this, try to calve small slivers of stryofoam at a time to avoid ragged edges, this is much better when sanding the styrofoam down later.


No comments:
Post a Comment